Update: In January of 2013 I shared a second quick-method for making lace crowns that does not use a microwave. Click HERE for that tutorial.
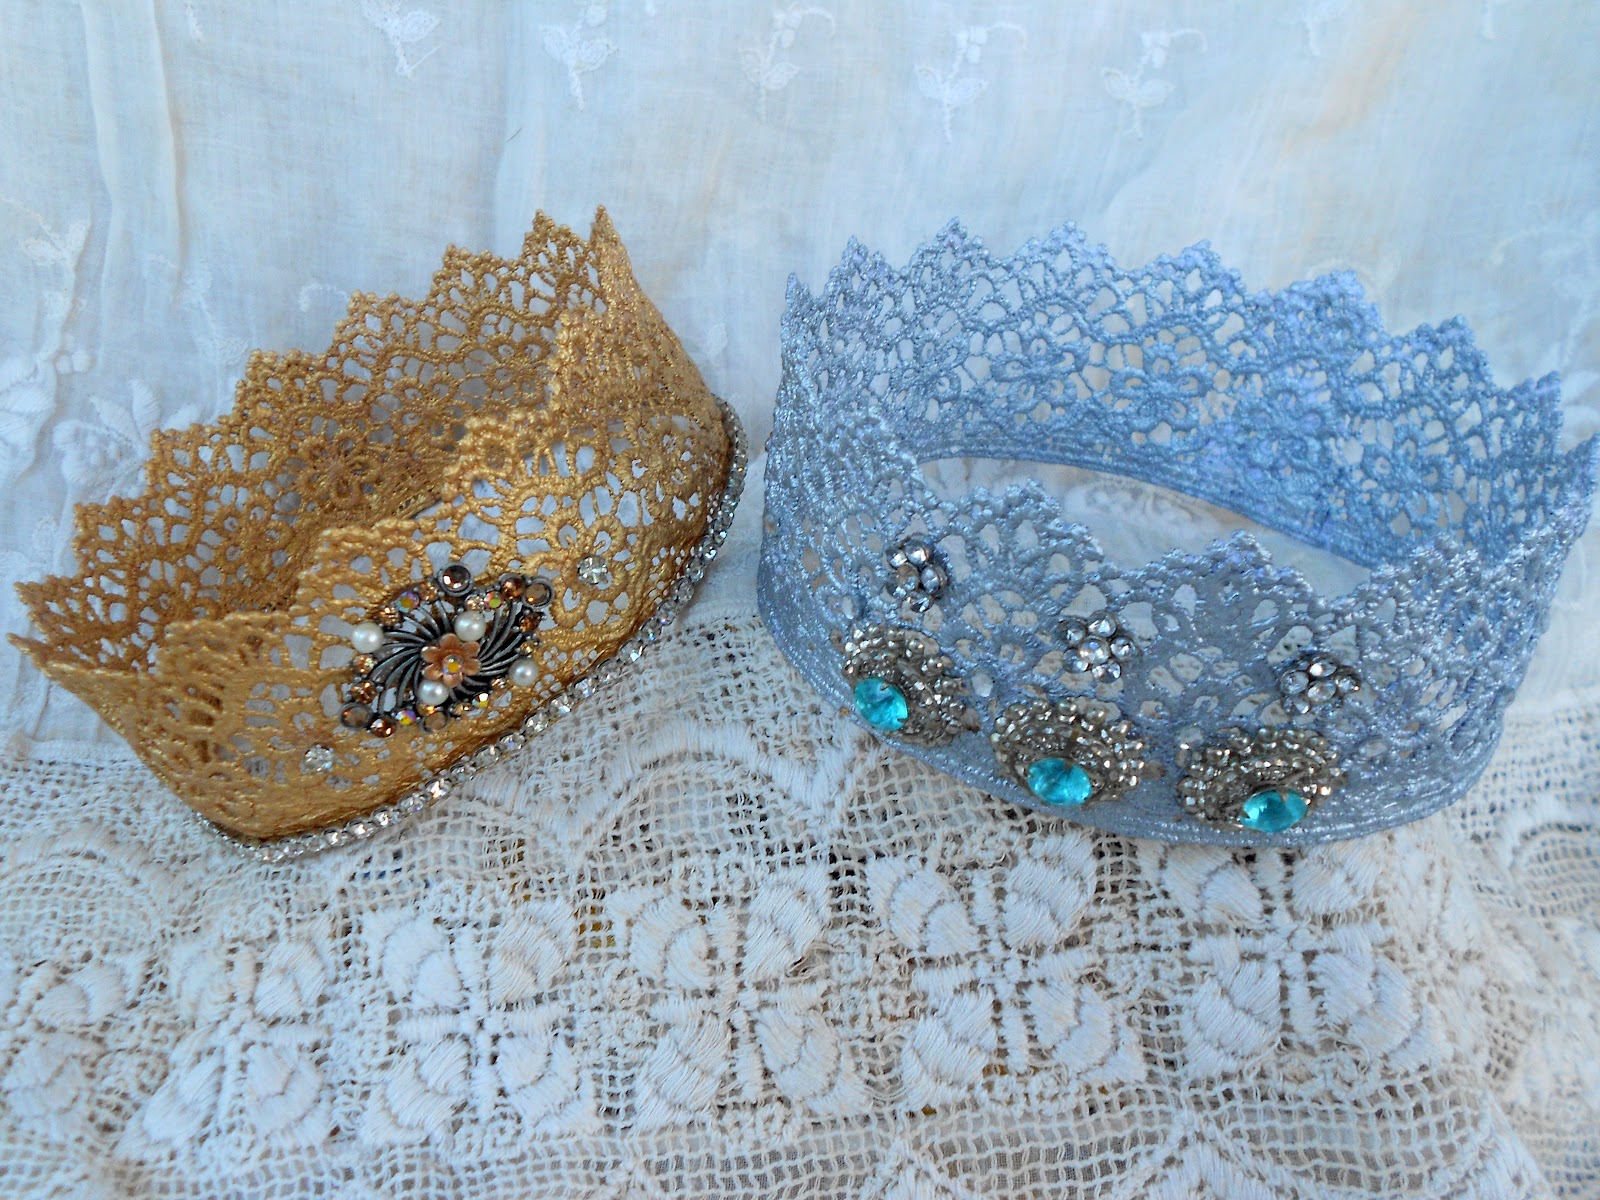
Who wouldn't feel like instant royalty with one of these lovely handmade crowns?
I often lament how little time there is left at the end of the day after chores, responsibilities, and my own creative projects, to try any of the amazing crafts I've been inspired by on Pinterest. But when I saw the lace crowns made by Joyfolie, I was wonderstruck. If I could have twitched my nose and transported myself immediately to my local fabric store, I would have. Lacking magical powers, I corralled the kids and hopped in the car.
This project is a beautiful way to repurpose
bits of vintage jewelry
Because the idea is nothing short of brilliant (in my opinion), creatives all over the blogosphere are adding their own unique spin to this project whose origin I've traced back to Bitter Betty Blogs.
I Like Shortcuts...and I'm not ashamed to say it.
Here's where my version comes in -- I'm usually short on time. Even when I have time, I'm terribly impatient. Waiting for paint or glue to dry is like....well..."watching paint dry". When I read the back of my bottle of fabric stiffener, I noticed that there was a "microwave method." It took a few trials and tweaks, but ultimately I figured out a quick, easy, and very rewarding way to make these lovely lace crowns.
Lace Crowns -- Quick Microwave Method
makes ONE 18" crown
- 1/2 yard crocheted lace
- (Also look for "Cluny Lace" or "Dyeable Cotton Lace". You can find the lace I used for these crowns HERE)
- Fabric Stiffener (I used Aleene's Stiffen Quick)
- Small bowl
- Tacky Glue
- 1 sheet posterboard
- scissors
- clear packing tape
- paper plate or parchment paper
- thin butterknife or offset spatula
- sewing pin
- Gold or silver metallic paint**
- Rubber gloves
- Paint brush
- Hot glue gun or a jewelry adhesive (I used Aleene's Platinum Bond Glass & Bead)
- Vintage jewelry, rhinestones, jeweled scrapbook trim, etc...
 |
I tried other types of lace, including some vintage lace, but found that crocheted lace is the sturdiest and least likely to burn in the microwave. The lace sold at my local "Beverly's" chain came in several colors. The white works well for a silver crown, and the beige is a good choice for a gold crown.
|
Step 1: Place lace in a small bowl and cover with fabric stiffener. Soak for 15 minutes.
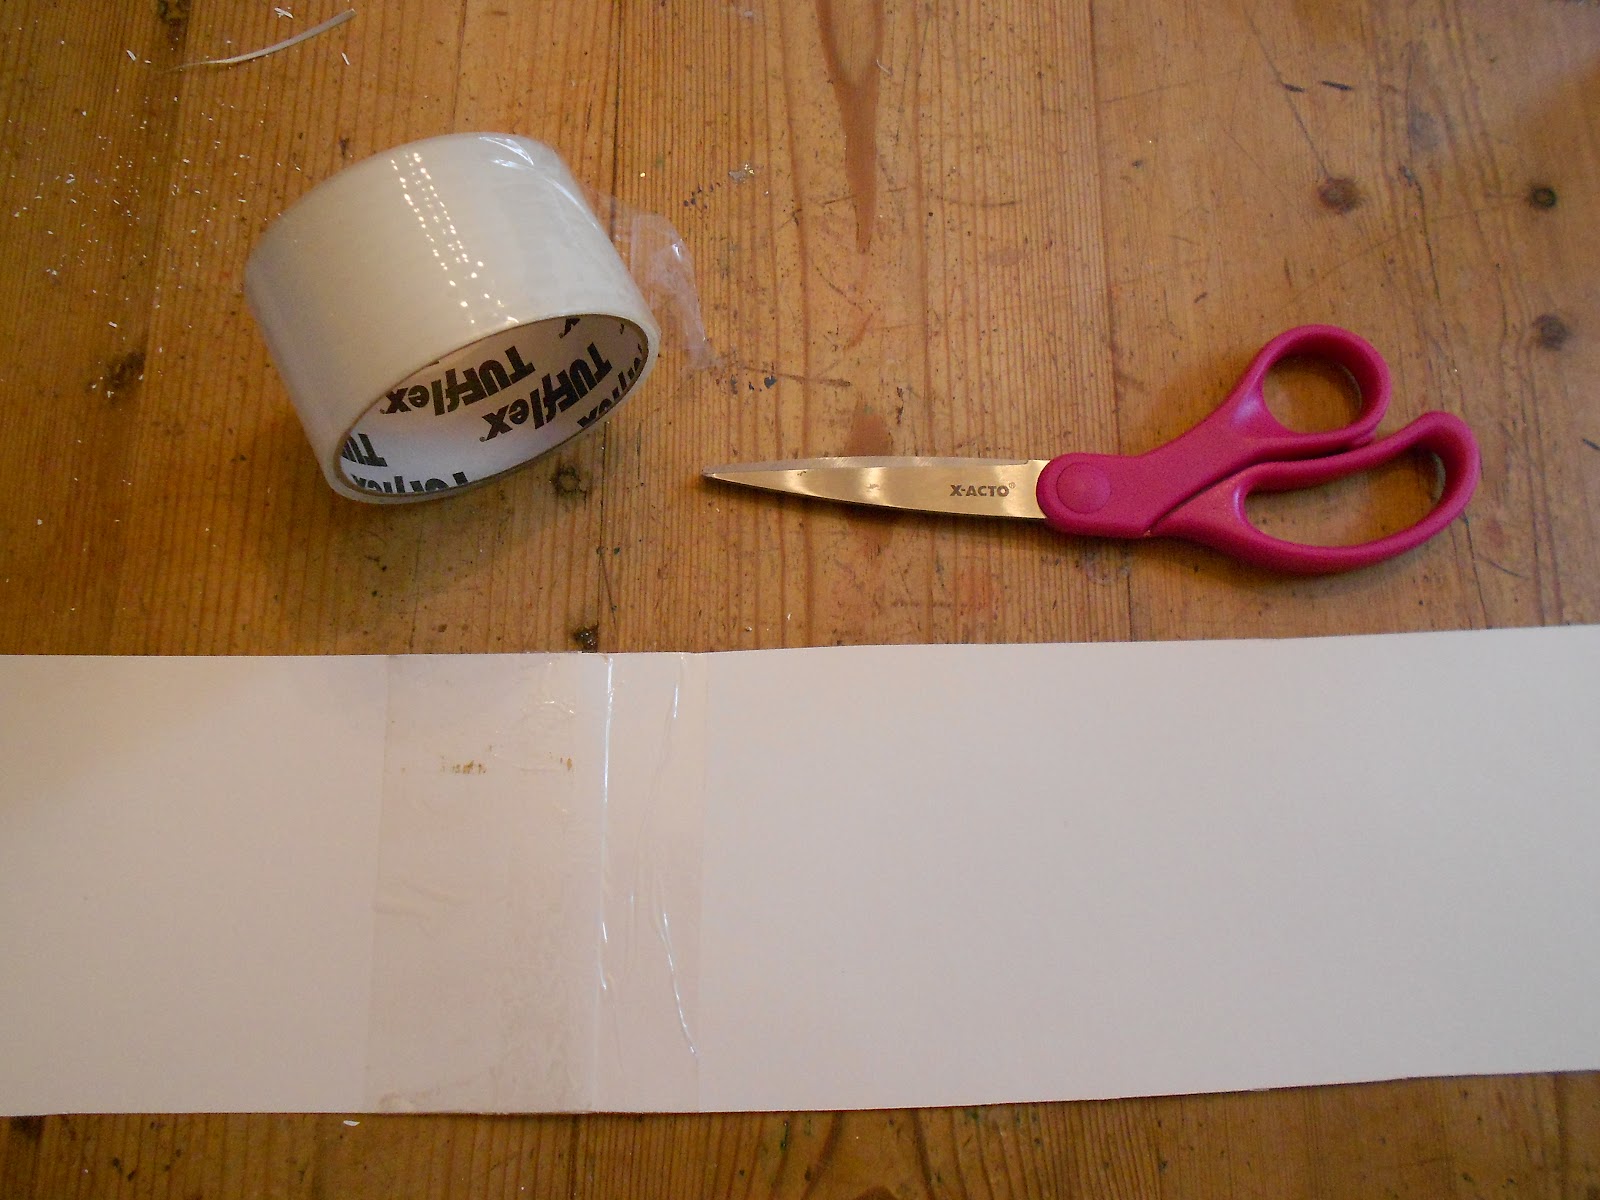
Step 2: While lace is soaking, prepare a crown form by cutting a 20" x 4" strip of posterboard. If using a smaller piece, cut two 10.5" x 4" pieces. Overlap by a 1/2" and tape together on the front and back.
Step 3: Roll the posterboard in to a tube, 17.5" in circumference, and secure with packing tape.
UPDATE: Some readers have experiences some trouble with the lace sticking to the posterboard. I recommend lining the posterboard (on the outside) with packing tape to provide a non-stick surface.
Step 4: Remove lace from bowl, allowing excess to gently drip back in to the bowl. Return excess stiffener to the original bottle. Wrap the wet lace around the base of the posterboard form. I used a spot of tacky glue to hold the overlapping ends of the lace together.
Step 5: Put crown and form on a paper plate or piece of parchment. Microwave on high power for 30 seconds. There may be some crackling sounds in this initial phase. Continue to microwave in 30 second increments (depending on the power of your microwave, you might be able to go up to a max of 1 minute increments), until the lace is dry to the touch.
Step 6: Remove plate from microwave and completely spray the crown (while still on the form) with stiffener. Return to microwave and microwave in short increments till it is dry to the touch.
Step 7: Repeat the process of spraying and drying until you've achieved the desired level of stiffness. For me, I found that 7 spray/dry cycles was sufficient.
Step 8: Remove crown from the form. You may need to slide a butterknife or offset spatula underneath to help loosen it. If some of the stiffener has closed up some of the holes in the lace, you can easily clean it out with the end of a pin.
Step 9: Return the crown to the plate and microwave for an additional 30 seconds to a minute. When removed from microwave, crown should be completely dry and stiff. Set the crown aside while you set up your paint.
 |
| This is my favorite brand for metallic paints. I purchased mine at Michael's crafts. They run around $10 a bottle, but the effect is well worth it. The gold and silver shine like the genuine article. |
Step 10: Wearing rubber gloves to keep your hands clean, paint the crown, inside and out. Do not be surprised when the crown goes soft with the application of the wet paint. It will stiffen, harder than ever, when it dries.
Step 11: Gently slide the wet crown back on to the posterboard form. Set aside to dry. You can use a hairdryer to help speed up the process, but DO NOT return the crown to the microwave.
Step 12: When crown is dry, attach bits of glitz and finery with a hot glue gun or jewelry glue. I used bits of broken vintage jewelry that I dismantled with the help of tin snips.
The only trouble is, they're so lovely that they're hard to part with!