This past week was chock full o' Halloween festivities, and with so little time, and so many places relying on volunteers for TREATS, I needed to come up with a quick and easy crowd pleaser to help get me through it all. I found my muse in a Halloween recipe on the Martha Stewart website. In the Martha recipe, she took a few calculated snips to a marshmallow to transform it into the shape of a skull. She used chocolate sprinkles for the eyes and nose, and used the whole thing to adorn a chocolate dipped Madeleine. I didn't have time to bake up a few dozen batches of buttery Madeleines, so my twist on Martha's clever marshmallow treat was to use the skulls to decorate chocolate dipped Oreo cookies on a stick. The "Skeleos" as I dubbed them, were a huge hit and were gone quicker than you could say "Boo"!
Here's how to make some SKELEOS of your own:
Ingredients
Marshmallows
Candy Melts or Chocolate Callets (My current fav are the ones from Trader Joe's)
Double-Stuff Oreos
Popsicle Sticks (I used a Provo Craft rolling alphabet stamp to personalize the sticks)
Kitchen Shears or Scissors
Pastry Bag or Ziploc bag
Parchment, Wax Paper, or Silpat lined baking sheet
Step 1: OPTIONAL -- If personalizing the sticks, do this first.
Step 2: Push Popsicle sticks into Oreos. Set aside.
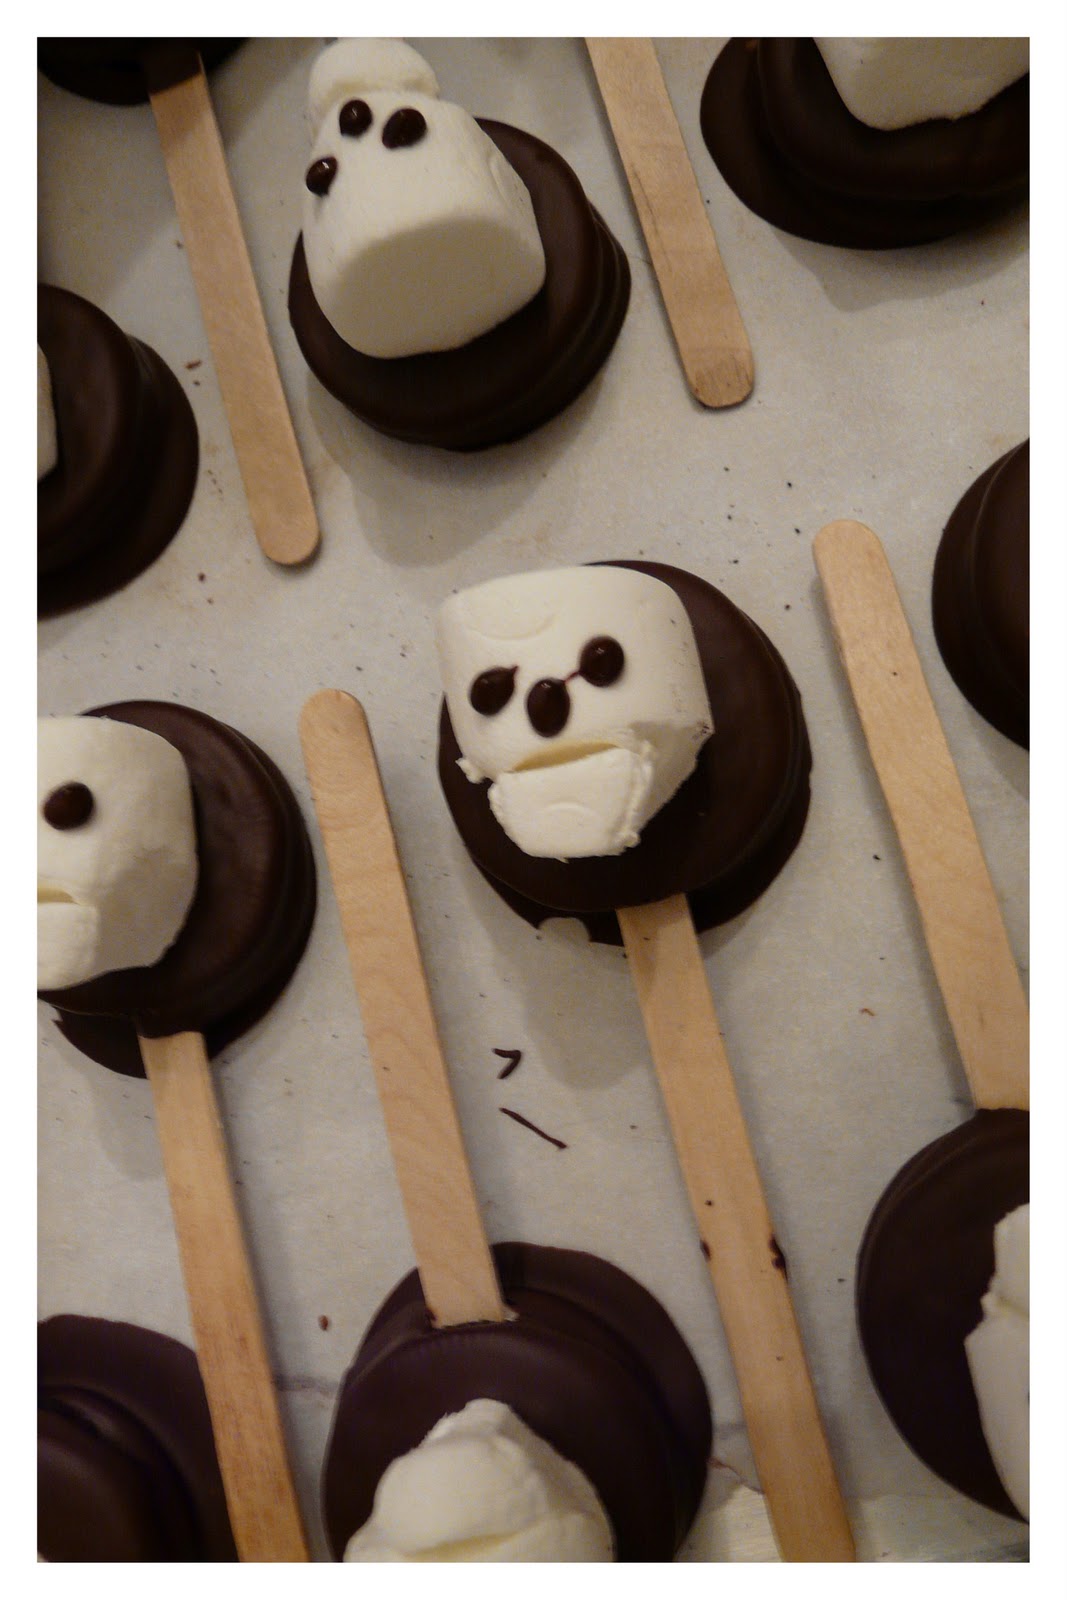
Step 3: Cut Marshmallows using kitchen shears or scissors: Snip 1/3 of curved side to create a flat surface. Next, trim a sliver from the left and right sides of the bottom of marshmallow to create a tapered chin shape. Then, cut a slit above the chin for the mouth. You may need to wash your scissors a few times during the process, as sticky scissors don't make the cleanest cuts.
Here's a short video that shows you how it's done:
Step 4: Melt chocolate over low heat. I prefer to use the microwave on low heat in increments of 30 seconds at a time.
Step 5: Dip Oreo in chocolate to cover completely, tap lightly on the side of bowl to remove excess, and set on parchment, wax paper, or silpat lined baking sheet. Place one marshmallow skull on top. When you've completed an entire pan, place in refrigerator for 10 minutes to help chocolate set.
Step 6: Put remaining chocolate in a piping bag or ziploc bag. Snip the tiniest hole in the bottom (you want the chocolate to come out very slowly). Pipe chocolate eyes and noses on the marshmallow skulls. Once the eyes have set the Skeleos are ready to serve.