What to do with those styrofoam trays that come packaged with food from the grocery store? Don't throw them away! With a little Mod Podge, newspaper and a few scraps of vintage graphics, your child can make a beautiful "lacquered" jewelry tray!
My friend Lynn is an amazingly creative first-grade teacher, so working in her classroom is a constant source of artistic inspiration! This past week, her class was busy transforming styrofoam trays into the most charming, vintage-looking jewelry trays as Mother's Day presents. I enjoyed working on the project with the students and couldn't wait to share the project with my girls.
Today, my 9 and 6-year old daughters made their own jewelry trays and handled both the Mod Podge and collage elements with a finesse that made me beam!
It's a simple, frugal, family-friendly craft that yields truly lovely results in relatively little time. Here's how to get started on your own:
 |
The crackle finish on this tray was the result
of an experiment with an enamel sealer. |
Lacquered Collage Jewelry Tray
Materials
Styrofoam food tray
(If you're doing this project with a group, you can purchase the trays at Smart & Final)
Newspaper
Mod Podge -- Gloss
You can find some great tips for working with Mod Podge HERE
Sheet music, maps, or book pages
Paint brush
Scrap images
optional: Mod Podge -- Hard Coat
Step 1: Start by cutting two long strips of newspaper to wrap the long sides of the tray and two shorter strips to wrap the shorter sides of the tray.
Step 2: Brush Mod Podge on the top and bottom of one of the long sides. Wrap a long strip of newspaper over the edge and seal with Mod Podge. Repeat with other side. Do the same with the shorter sides.
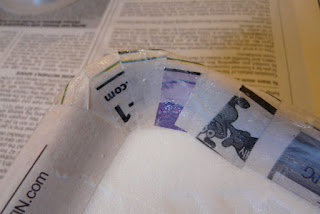
Step 3: Wrap the corners by overlapping short, thin strips of newspaper, taking care to Mod Podge underneath and on top.
Step 4: Apply Mod Podge to the base of the try and fill in with scraps of newspaper. Inspect paper for air bubbles. Use a finger to buff out air bubbles and to press down any areas that have not adhered completely. Dry (approx. 20 minutes).
Step 5: When top of tray is dry, cover the bottom of the tray using the same techniques.
Step 6: Once both the top and bottom are dry, repeat the process with the paper that you'd like to have showing for the finished piece. We used a combination of sheet music and dictionary pages. Again, the best method for covering the edges is to work in long strips. For the corners, the small overlapping pieces ensures the best coverage.
Note -- Do not skip the newspaper layer and go directly to the top layer. The project needs the two layers of paper to build up a substantial lacquered-wood feel, rather than feeling like styrofoam.
Step 7: Use a finger to buff out any air bubbles, and to help paper adhere smoothly, especially at the corners. Once front of tray is dry, repeat with the back.
 |
For the base of the tray, we used a large
piece cut to fit, rather than a patchwork. |
Step 8: Once the tray has dried, you can begin adhering and sealing images with Mod Podge. We used a combination of downloaded scrap images and copies we made on the home copier of old family photos, game pieces, and vintage postcards. IMPORTANT -- If using home-printed images, allow 24 hours for images to cure, otherwise, the Mod Podge could cause the images to bleed.
Step 9: Once all of the images have adhered, seal entire tray with a final coat of Mod Podge. For a hard and lacquer-like finish, use Mod Podge Hard Coat.
 |
| This is one of the trays that my daughter made. |

______________________________
This post has been linked-up with:


