Chonky Boys: The Chocolate Chip Cookie Ice Cream Sandwiches that Scream Summer!

Image
Featuring my thick and nuggy Chonky Boy Chocolate Chip Cookies, these ice cream sandwiches are the stuff that summer dreams are made of.  If you've ever had the Cookie Ice Cream Sandwich at Disneyland , you are going to LOVE these!  These big and bold chocolate chip cookies are based on a recipe from my culinary school studies at Auguste Escoffier, but with a few modifications to give them that Jennuine touch.  They make the perfectas book for a fat slice of real vanilla bean ice cream.  And those mini chips?  You just gotta have that extra cronch! Thank goodness this recipe only makes 8 sandwiches, otherwise I would be eating them for breakfast lunch and dinner.  This way, my big family can help save me from my inner child diet-saboteur.   Print With Image Without Image Chonky Boy Chocolate Chip Cookie Ice Cream Sandwiches Yield: 8 Author: Jenn Erickson Loaded with chocolate chips and buttery, brown-sugary vanilla flavor, these mall-sized cookies form a perfect partnership with a

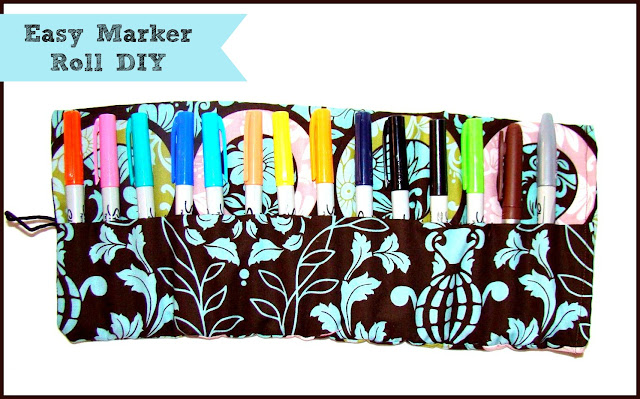
BACK TO SCHOOL WEEK II -- Easy Marker Roll Tutorial


It's our first official MONDAY of school and we're bracing ourselves for what's to come in the 5th grade homework arena.  We're tightening up our routines, planning week-long dinner menus, and setting out the girls' outfits at night.  With all the busy goings-ons that come with Back-to-School, I've been particularly grateful to all the talented bloggers who have shared their tutorials and recipes over the past two weeks.  I hope you've found an inspiration or two.

Today marks the last installment of Back-to-School Week at Rook No. 17. Today's guest blogger is Fawnda of Fireflies and Jellybeans with her wonderful tutorial for this chic little felt-marker roll:


----------------------------------------------------------


Hello Rook No. 17 readers!
I am so excited to be here to day to share with you a fun Back to School Craft!  


Let me introduce myself! 

I am Fawnda and you can find me at Fireflies and Jellybeans!  I am a thirty-something mom of a son (3 1/2 years old) and a daughter (15 months)!  My Husband is my best friend and biggest supporter {I am every lucky}! We have all sorts of fun over at Fireflies and Jellybeans! I share crafty tutorials with you, we have the Iron Crafter Competition and a fun Show Off Your Stuff linky party on Thursdays.


  Today I will be showing how to make a Marker Roll.   I bet that this would last longer than the marker boxes would inside a desk, and this would be great to carry your pencils or pens in if you make it a bit taller... Plus it is SUPER cute! 


Materials:

  • Three rectangles of fabric all 16 X 7 inches (1 piece for the outer, 1 piece for the lining and 1 for the pocket) (my outer and lining are from the same fabric)
  • 1 rectangle of heavy interfacing 16 X 7 inches
  • Coordinating thread
  • Elastic hair band
  • Button
  • Sewing machine


1.) Iron all of your fabric to get out all of the wrinkles. Iron on your interfacing to the lining piece of your fabric using the directions from the interfacing.

 
2.) Fold the fabric for the pocket in half and press

 
  3. open the fold and place the pocket onto the lining right sides together. Now we are going to make our marks to make the slots where the markers will fit. With a ruler measure 1.5 inches from the end and mark it, than make marks 1 inch until you get to the end and the last mark should be 1.5 inches from the end. I made marks on the bottom and at the fold and than used my ruler to make the straight lines.


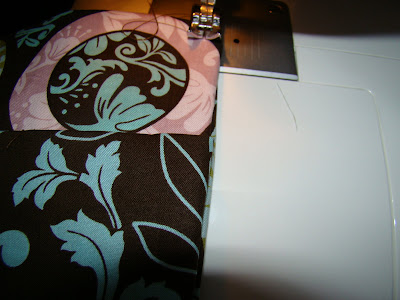
  4. Sew on the lines that you made stopping at the fold crease.

 
This is what your stitched should look like.

 
5. Fold down the top part of the pocket... now your sticks are hidden.


6. Decide where you want the elastic band to go and pin into place(this will be what wraps around the button to hold it in place. You want to make sure the metal part is on the outside of the fabric. I placed mine in the middle at the fold of the pocket


 7. Place your outer fabric on top of your lining and pocket right sides together and pin in place.


 8. Using a 1/2 inch seam allowance sew around the outside of the fabric, leaving a 2 inch opening.


9. Flip the fabric right-side out using the opening that you left.


 10. Top sew the opening closed.


11. Place your markers into the slots


11. Roll it up and pull the elastic band to see where the button should go. Place a pin to mark the spot.


 It is hard to see, but I have a pin marking my spot in this picture.

 
12. Unroll and sew your button on and your done!


Now our markers can go anywhere and not make a mess!


Stop by Fireflies and Jellybeans for more fun ideas!


Popular posts from this blog

Nostalgia Food: Old Fashioned Apple Hand Pies

Garlic Toast Points with Marbled Beet Chevre and Edible Flowers

How to Host a Game of CLUE Party for Kids
+ Printable/Customizeable Invitations