Cloaked by stealth
And dressed in black
The Shadow Ninjas
Have your back
Forget home security systems!
You can train your own elite squad of home-ninjas in less than a day!
This past January, we had tremendous fun putting together this Ninja themed party to celebrate my daughter's seventh birthday. Inspired by ideas I had collected through Pinterest, and adding a few creative touches of my own, this party came together quickly, easily, and inexpensively. The kids were engaged in non-stop activities, and left feeling accomplished, proud, ready for bed!
Ready to train a Ninja squad of your own? Below you'll find ideas, recipes, tutorials and printables to make it easy.
Scrolled Invitation
Start with an invitation that sets the tone of ceremony and mystery. These scrolls are easy to put together. You'll find the tutorial HERE.
Ninja Shrine of Sweets
 |
Rice Krispie Sushi
Chocolate Nunchucks
Stealth Disks (Red and Black Oreos)
Chocolate Bow Staffs (Pocky Sticks)
|
 |
The idea for the Krispie Sushi came from Catch My Party.
|
 |
Chocolate Nunchucks inspired by Kara's Party Ideas. Original Post HERE.
We had a tough time with our licorice ropes. The Red Vines were so
fresh that they kept breaking. Just make sure that you get a pack that
isn't super soft.
|
I designed these Ninja Water Bottle Wraps.
You can download them for free HERE.
NINJA TRAINING
Stage 1 -- KARATE BASIC TRAINING
A 20 minute karate class including basic blocks, kicks, safety and philosophy was given by my older daughter, a Tang Soo Do brown belt.
Stage 2 -- BOARD BREAKING
We purchased balsa wood boards from a local craft store. Each child had the opportunity to break a board.
Stage 3 -- THROWING STARS
For the throwing star game, we purchased some wood stars from the craft
store and drilled a hole in the center of each. We painted them silver,
and had the kids take turns trying to hit targets with them.
Stage 4 -- AGILITY TRAINING
We got this idea from the girls' karate classes. Foam noodles are used to simulate different scenarios from leaping across river beds and rooftops, to ducking under a swinging obstacle and avoiding a lashing viper.
Stage 5 -- BATTLE THE WHITE NINJA
Having made it this far, the young ninjas earned their katana swords (foam swords purchased from the $1 section at Target). While they practiced sword combat, my older daughter snuck inside and put on a white ninja costume. She went around the house and surprised the kids when she appeared in the yard and challenged them each to a one-on-one duel.
Each child had a turn to battle "The White Ninja" and achieved a win when their sword touched the red emblem on her chest.
Final Stage -- UZURA-GAKURE
We explained that even more important than being skilled in battle is a ninja's mastery of the art of camouflage -- thereby avoiding combat altogether. Therefore, the final step for the kids' ninja training was to master Uzura-Gakure -- the ability to camouflage oneself as a rock.
As I prepared to go inside to get the headbands for the graduation ceremony, the kids were told to camouflage themselves as rocks. When I returned, they were all completely silent and curled into rock formations. We pretended not to be able to see them. The looks on the kids' faces were priceless.
 |
| I created this image and used iron-on transfer paper to put the image on black bandanas purchased from Oriental Trading. You can download an entire printable sheet HERE. |
Because they had rendered themselves nearly "invisible", we called them out of hiding, one by one, to be presented with their ceremonial Shadow Ninja headband -- thereby completing their training and ascension to ninjahood.
Introducing the Shadow Ninja class of 2012
Ninja Feast
After all that physical activity, the kids were famished. The table was set in advance with platters of small oranges (a symbol of wealth and luck). At each place setting were small Chinese take-out containers filled with pretzel sticks, for the kids to munch on while we brought out dinner. Dinner consisted of Chinese noodles, steamed edamame, and peanut butter and jelly "sushi".
 |
| The noodles were served in red take-out containers. |
 |
| The Sushi PB&J Rolls from Bon Appetit (photo source) were delicious! |
|
 |
| These Cake-Outs start by baking brownies right inside the container. They're topped with a squiggle of peanut butter frosting for "noodles", Reese's crumbles, and are garnished with edible "chopsticks". Recipe/tutorial HERE. |
| |
PARTING GIFT
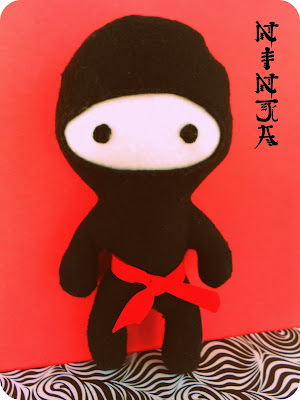
After dinner, the kids watched Kung Fu Panda II. As each little ninja left the house, they received their own handmade plush ninja pal -- a card slipped in to his red karate belt reading, "Sleep Tight Little Ninja".
You can find the tutorial and free pattern for the plush ninjas HERE


