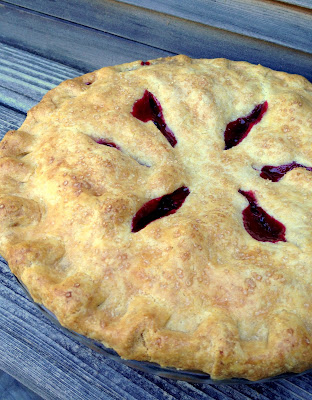
Enjoy a slice of pure heaven -- the sweetness of summer peaches balanced by the tartness of blackberries, snuggled in the warm embrace of a buttery cornmeal crust. It's a beautiful thing!
On Fathers Day weekend we went berry picking. With our bounty, I created this dessert in honor of my sweet, pie-lovin' husband.
The buttery, flaky crust is made with a touch of cornmeal which gives it a nutty, toasted flavor that perfectly compliments the sweet/tart filling. You can use fresh or frozen peaches and berries, so you can enjoy this pie any time of the year!
Deep Dish Blackberry Peach Pie
(Makes 1 9-inch deep dish pie)
Crust*
1 3/4 cups all-purpose flour
3/4 cup yellow cornmeal
1 teaspoon salt
1 teaspoon granulated sugar
1 cup butter, cold, cut into small pieces
4-7 Tablespoons ice water
Filling
7 cups sliced ripe peaches (skin removed), fresh or frozen (must be completely thawed)
3 cups blackberries, boysenberries, olallieberries or loganberries, fresh or frozen (must be completely thawed)
1 cup granulated sugar
1 pinch of cinnamon
1/4 cup tapioca
2 Tablespoons heavy cream
1 Tablespoon large grain sugar such as turbinado
Step 1: Combine flour, cornmeal, salt and sugar in the bowl of a food processor and pulse to combine. Add the butter and pulse until it looks like a very coarse meal, taking care not to over-pulse. With the machine running, add the water, one tablespoon at a time just until the mixture starts to come together (no more than 15-20 seconds). Turn the dough out onto a clean work surface and divide in half. Put each half into a one-inch thick circle and wrap in plastic. Refrigerate for at least an hour.
Step 2: Place a foil-lined baking sheet on the middle rack of oven. Preheat oven to 375 degrees F. The preheated pan is the trick to avoiding a soggy, uncooked bottom crust.
Step 3: On a lightly floured work surface, roll out one of the crusts to a 14" round. Transfer the round to the bottom a 9-inch deep-dish pie plate. Place in refrigerator.
Step 4: Combine the peaches, berries, sugar, cinnamon and tapioca in a large bowl and mix until well combined. Let sit for 10 minutes. Note: It is important that if using frozen fruit, it be completely thawed and at room temperature before baking. Otherwise, the filling will not come up to temperature and the tapioca will not set.
Step 5: Roll out the second pie crust. Transfer the filling to the crust-lined pie plate. Place second crust on top of the filling. Trim edges to 1" overhang, then turn under. Use two fingers to crimp the edges. Cut 6 slits in the top crust to allow steam to escape. Brush top crust with cream and sprinkle with the large grain sugar.
Step 6: Place on the preheated baking sheet in the oven and bake until golden brown, and juices bubble thickly through the slits. Check the pie periodically to check for browning around the edges. If crust is browning to quickly, cover the edges with foil. Bake for a total of 1 hour and 20 minutes. Cool on a rack for at least 2 hours before serving.
Enjoy!


.JPG)