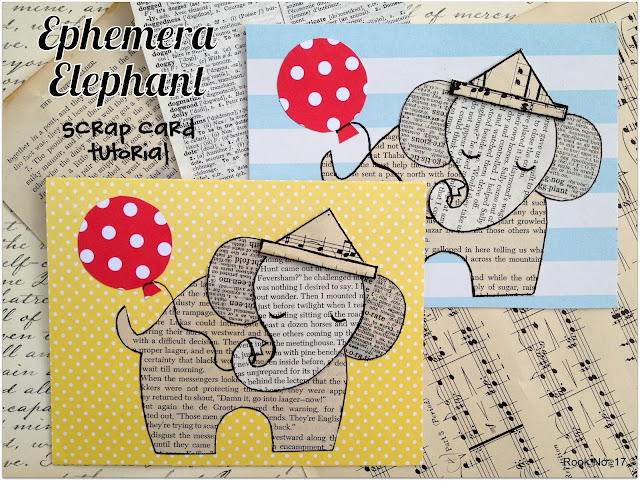
I just had to craft something today.
I had the urge.
I went with it.
I grabbed my scrap-paper box,
an Elmer's glue stick and a black pen.
I found this little guy patiently waiting at the end.
They say that an elephant never forgets.
Ephemera, by definition is transitory and lacks permanence. In elephant form, I like to think that these old scraps of printed material are likely to be around and enjoyed for a long while.
What do you think?
You don't need any special tools.
You probably have everything you need at home.
So, grab some paper scraps, your scissors and glue and let's make some Ephemera Elephants!
Ephemera Elephant Cards
-- a scrap paper DIY project --
Materials
paper scraps
cardboard (I used a cereal box)
elephant template (download HERE for free)
thin black ink pen
scissors
glue stick
cardstock or 6.5" x 5" cards
Step 1: Download the free elephant template HERE. Cut out the pieces. Trace on to cardboard; then cut out the cardboard pieces. This will give you nice sturdy pieces to work with.
Step 2: Trace the shapes on various pieces of scrap paper. I used old sheet music, book pages and dictionary pages for the body and bright red paper for the balloon.
Step 3: Cut out the shapes on the outside of the black line. You want to keep the black outline intact (except with the balloon).
Step 4: Fold the hat.
 |
| Adapted from: http://tlc.howstuffworks.com/family/paper-hats3.htm |
Image 1
A: Fold short end to short end.
B: Fold in half (left to right) to crease. Unfold.
C: Fold left and right corner in to line up with the crease.
Image 2
D: Fold bottom up so that bottom edge meets with bottom edge of the triangles.
E: Fold a second time to form the brim of the hat.
F: Flip hat over and repeat steps D&E.
Finished hat should look like this.
Step 5: If desired, glue a piece of decorative paper to the face of the card for a contrasting background. Then, glue the elephant pieces to the card and each other. Ears should go slightly under the head.
Step 6: Outline the hat with the black pen. Draw some eyes with the black pen.
Step 7: Glue balloon in place. Draw a string with the black pen.


