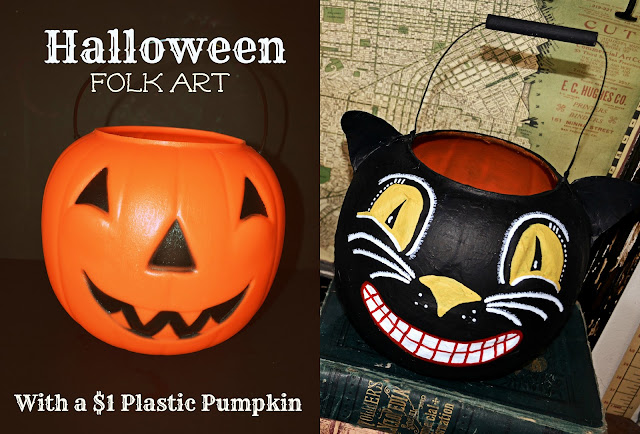
One of my favorite characters from vintage Halloween folk art is the black cat ~ always sporting a mischievous look and a cheeky grin.
 Last year, I transformed a trio of styrofoam pumpkins from the dollar store into paper mache folk art.
This year, with the same $1 budget in mind, I set to work on a classic blown plastic jack-o-lantern treat bucket -- the same jolly guy that's been around since I was a kid.
Although I'm nostalgic for his familiar orange mug, I thought it would be fun to transform him into a wiley black cat. So, one afternoon, my daughter and I grabbed an old newspaper and our Mod Podge and set to work...
Vintage-style Halloween Folk Art Black Cat
- 1 blown-plastic pumpkin treat bucket, any color
- Newspaper
- Mod Podge or Paper Mache paste
- Ear template (download HERE)
- Heavy card stock or a manilla folder for the ears
- pencil and scissors
- Paint brushes of various sizes
- Black acrylic paint
- Assorted acrylic paints and/or paint pens
- Awl or bamboo skewer
- Heavy black wire (I used a 16 gauge flat aluminum wire)
- Wire cutters
- Needle-nose pliers
- 1 piece dowel
- hand saw
- drill
Step 1: Remove the plastic handle. Apply bits of newspaper and Mod Podge or paper mache paste to the entire exterior of the pumpkin. We actually found that a paint brush worked better than the foam brush. Set aside to dry.
Step 2: Trace ear pattern on to heavy card stock or a manilla folder. Cut out, then fringe ends as shown in picture to allow for the ear to curve. Set in place on the pumpkin (align behind the holes for the handle so that when the new handle is attached, it won't interfere with the ears), then attach with your adhesive. Paper mache over the ears. Set aside to dry.
 |
| Please ignore the fact that the pumpkin is already black. Truth be told, I forgot to add the ears during the initial paper mache stage. |
Step 3: Paint entire exterior of the pumpkin black. Set aside to dry.
Step 4: Paint a cheeky cat face. Mine was a composite of various vintage folk art cats that I looked at online. Optional: paint the inside of the pumpkin with a vintage orange color to disguise the plastic.
Step 5: Use an awl or bamboo skewer to punch through the original holes for the handle.
Step 6: Cut a 3.5" segment of dowel. Drill a hole all the way through the center of the dowel (size of hole will depend on the size of your wire).
Step 7: With wire cutters, cut an 18" segment of wire. Thread through the dowel.
Step 8: Thread one end of the wire through one of the small holes in the top of the pumpkin. Go in through the outside, and back up through the large opening. Repeat with opposite end of wire on opposite side of pumpkin. Once you have the dowel handle centered, wrap the loose end of each wire once around itself to secure. Trim, then crimp with needle-nose pliers.
Step 9: Paint dowel and touch up any remaining areas.
---------------------
This post has been linked-up with the


