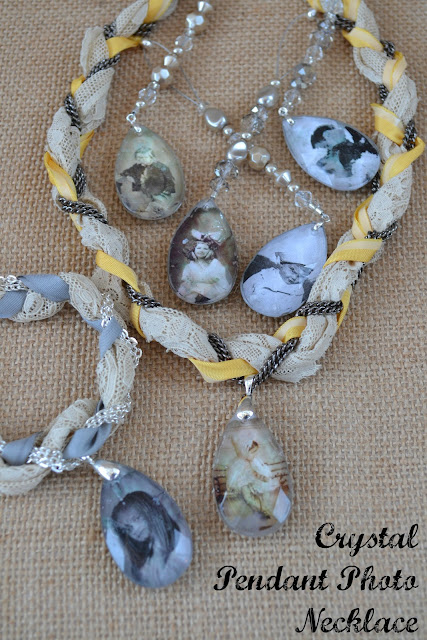
A few weeks ago I shared my tutorial for how to make personalized family photo ornaments using chandelier crystals and Mod Podge Dimensional Magic. At the same time that I made the ornaments, I turned two of the pendants into vintage-style necklaces. Each necklace featured a photo of one of my girls. The necklaces are easy and inexpensive to make and are a wonderful way to carry someone you love close to your heart.
Crystal Pendant Photo Necklace
- 1 crystal photo pendant (tutorial HERE)
- 1 bail
- 3 strands of chain, 24" long/ea
- 1 24" piece of silk ribbon or vintage binding
- 1 24" piece of ivory lace (I used a vintage piece that was 2 3/4" wide
- 3-in-one jewelry pliers
- 2 8mm open jump rings
- 2 4" pieces jewelry wire (thin enough for two strands to fit through your crimp beads.
- 2 filigree bead caps or bead cones
- 2 crimp beads
- 1 toggle clasp
- 2 crimp bead covers (optional)
Step 1: Attach the bail to the pendant by inserting either end of the bail into the hole in the top of the pendant.
Step 2: Open one of the jump rings slide one end of all three chains on. Use pliers to close the jump ring.
Step 3: Thread ribbon and lace through the jump ring. Knot just above the jump ring, then trim.
Step 4: Braid the chain (acting as a single strand), ribbon and lace, half way down. When you reach the middle, loop the pendant onto the chain. Continue braiding till approx. 1/2" remains.
Step 5: Repeat step 2 with the open end.

Step 6: To attach the toggle, first slide one of the 4" wires up through the jump ring on one side of the strand. Bring both ends of the wire up through a bead cap or cone to conceal the knotted ribbon. You may wish to add a small dab of glue inside the cap.
Step 7: Thread both wires through a crimp bead. Thread both wires through the loop of one end of the toggle clasp. Bring the wires back down through the crimp bead to create a tight loop. Adjust so that toggle piece is close to the bead cap. Crimp the crimp bead in place with pliers. Trim excess wire. Cover crimp bead with a crimp bead cover for a finished look.
Step 8: Repeat process with the opposite side of the necklace and toggle clasp partner piece.


