Featuring my thick and nuggy Chonky Boy Chocolate Chip Cookies, these ice cream sandwiches are the stuff that summer dreams are made of. If you've ever had the Cookie Ice Cream Sandwich at Disneyland , you are going to LOVE these! These big and bold chocolate chip cookies are based on a recipe from my culinary school studies at Auguste Escoffier, but with a few modifications to give them that Jennuine touch. They make the perfectas book for a fat slice of real vanilla bean ice cream. And those mini chips? You just gotta have that extra cronch! Thank goodness this recipe only makes 8 sandwiches, otherwise I would be eating them for breakfast lunch and dinner. This way, my big family can help save me from my inner child diet-saboteur. Print With Image Without Image Chonky Boy Chocolate Chip Cookie Ice Cream Sandwiches Yield: 8 Author: Jenn Erickson Loaded with chocolate chips and buttery, brown-sugary vanilla flavor, these mall-sized cookie...
Get link
Facebook
X
Pinterest
Email
Other Apps
Tastes Like Childhood ~ Classic Caramel Corn Recipe
Get link
Facebook
X
Pinterest
Email
Other Apps
-
When I went back to teaching full-time as a Culinary Arts instructor, blogging moved to the back burner. But the world sure has shaken up the status quo these past few weeks. I'm thankful that I am still able to teach from home, and like everyone, am adjusting to this strange new world, sequestered away with my husband and six not-so-little monkeys.
For my own sanity, and hopefully as a way of providing some home-cookery-catharsis to others, it seems like a good time to start sharing some of the recipes I've developed and fine-tuned over the years for my students.
Like one of my all-time favorite sources for recipes, America's Test Kitchen, my high school classroom is a bit of an America's Teenage Test Kitchen -- my recipes go through rigorous testing and refinement, ultimately passing the can-do test for 100 or more teenagers at all different academic levels, culinary experience levels, and abilities.
With most people stuck at home and resources limited, I decided to have my first recipe share be my caramel corn recipe. It's simple, delicious, and uses only a few ingredients. It's perfect for snacking and satiating a sweet-tooth. Enjoy!
Classic Caramel Corn Recipe
Yield: 10 cups
Author: Jenn Erickson
Prep time: Cook time: Total time:
Delicious caramel from scratch is used to make a perfect snackable caramel corn.
Ingredients:
For the Caramel
1/2 stick unsalted butter cut into 4 pieces
1/2 cup granulated sugar
1/2 cup brown sugar (not packed)
1/2 cup corn syrup
1/2 can sweetened condensed milk (half of a 14 oz. can)
1/2 teaspoon vanilla extract
For the Perfect Stovetop Popcorn
3 tablespoons coconut oil or other high smoke-point oil
1/2 cup of high quality popcorn kernels
One 3-quart heavy-bottomed pot with lid
For the Caramel Corn
10 cups popped popcorn (stovetop recipe below)
1 cup caramel (recipe for homemade is below)
2 Tablespoon water
1 teaspoon baking soda with no lumps
Instructions:
Spray a 2-cup glass measuring cup and set aside.
Wet your medium saucepan (the inside), then dump out water. Do not dry.
In the prepared saucepan, add your butter pieces. Melt over medium heat.
Remove from heat. Into the melted butter whisk in sugars, corn syrup and condensed milk (NOT VANILLA) till smooth. Return to burner at half power.
Attach a candy thermometer. Cook on half power (medium) until temperature reaches 240, whisking gently, but constantly and being sure to scrape the bottom.
Once thermometer reads 240, remove whisk carefully. Continue stirring with a rubber scraper, taking special care to constantly scrape the bottom, until thermometer reads 250.
During this time, pop your popcorn. Caramel takes the longest between the 240 and 250 mark.
Remove pan from heat as soon as temp reaches 250. Stir in vanilla.
Pour Caramel into the prepared, sprayed 2-cup glass measuring cup. You'll use 1 to 1 1/4 cups of the caramel for the Caramel Corn recipe.
In a large pot with a heavy bottom, heat the oil over medium heat.
Put 3 kernels into the oil. Wait for the popcorn kernels to pop.
When the kernels pop, remove them with tongs; add the rest of the popcorn in an even layer.
Cover the pot all the way, remove from heat and count 30 seconds.
Return the pan to the heat with lid just slightly offset to allow a little steam to escape. The popcorn should begin popping soon, and all at once.
Once the popping sounds like it’s reached a peak, gently shake the pan by moving it back and forth over the burner for a few seconds.
Once the popping slows to several seconds between pops, remove the pan from the heat, remove the lid, and dump the popcorn immediately into your serving bowl, or if making Caramel Corn, directly on to your foil-lined baking sheet with nonstick spray.
Make the Caramel Corn
Preheat oven to 300 F
Completely line a baking sheet with foil, then spray with nonstick spray
In a small saucepan, add water and caramel. Cook, whisking constantly over medium-low heat until bubbling.
Remove from heat. Whisk in baking soda. Caramel will bubble and become lighter in color. Immediately pour caramel evenly over the popcorn.
Use a rubber scraper sprayed with nonstick spray to fold to coat the popcorn quickly and carefully (caramel is hot).
Place pan in center rack of oven for 8 minutes. Remove from oven. Sprinkle with 1/2 teaspoon sea salt. Stir and fold with rubber scraper to distribute caramel.
Cook for an additional 8 minutes.
Remove from oven and immediately scrape up caramel that has stuck to the bottom of pan. Fold over onto popcorn.
Transfer popcorn to another lightly sprayed pan or piece of parchment paper.
When warm to the touch, break up caramel corn with your fingers. Enjoy.
Notes:
Can be stored in an airtight container for up to 7 days.
I recall, as a child, going to The Chart House restaurant and looking forward to the basket of freshly baked breads. My favorite was always the dark brown, slightly sweet bread that the servers called "Squaw Bread". I've heard that a similar bread is served at The Cheesecake Factory. The name has gone out of fashion, since "squaw" is a derogatory term for a Native American woman. The history of this bread can in fact trace its roots to Native American origins when German pioneers combined their traditional German Brown Bread recipe with ingredients available to them through trades with the native people during their westward travels. No matter how you slice it, this New World German Brown Bread is easy to bake and so wonderfully delicious to eat. Print With Image Without Image New World German Brown Bread Yield: 1 large loaf Author: Jenn Erickson Prep time: 1 H & 50 M Cook time: 45 M Total time: 1 ...
THIS GIVEAWAY HAS CLOSED. VIEW THE RESULTS HERE THANK YOU FOR ENTERING! When you think of classic, sophisticated style icons, who do you think of? Audrey Hepburn? Jacqueline Kennedy Onassis? Coco Chanel? While some might argue that style of their caliber is but a thing of the past, I can disprove that contention with two words: Shabby Apple . I am delighted to introduce Shabby Apple as the latest member of the Rook No. 17 sponsor line-up, after joining their affiliate program this month. As Rook No. 17 continues to bring you original recipes, crafts and ideas for inspired living, I am happy to also have the opportunity to share a few select companies that I think are exceptional . These are places I personally adore, patronize, and come back to time and time again. Shabby Apple is a company that was started by two friends on a mission to create dresses "that make dressing simple...a return to what dresses were always...
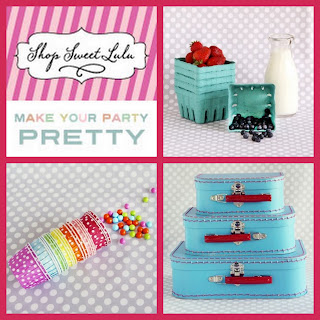
If you've ever taken a glance to the right of the posts at Rook No. 17, you may have noticed a button for my favorite online source for charming party accoutrements, decor, finery and fancies -- Shop Sweet Lulu ! Perhaps you caught a glimpse of the striped and polka-dotted paper straws I bought from Shop Sweet Lulu for my daughter's summer beach party in September... ...or the farmhouse milk bottles we used at the Toy Story Birthday party . When I'm planning a party, I always know I'll find something extra special at Shop Sweet Lulu ! Pictured above are some of my favorite items (clockwise): Farmhouse Milk bottles, paper straws in colors and patterns for every occasion, push-up pop containers, and a kaleidoscope of baking cups! If you're planning something sweet for Valentine's Day, you won't want to miss the party essentials and decorative whimsies at Shop Sweet Lulu . GIVEAWAY I'm so de...