Posts

Chonky Boys: The Chocolate Chip Cookie Ice Cream Sandwiches that Scream Summer!

Image
Featuring my thick and nuggy Chonky Boy Chocolate Chip Cookies, these ice cream sandwiches are the stuff that summer dreams are made of.  If you've ever had the Cookie Ice Cream Sandwich at Disneyland , you are going to LOVE these!  These big and bold chocolate chip cookies are based on a recipe from my culinary school studies at Auguste Escoffier, but with a few modifications to give them that Jennuine touch.  They make the perfectas book for a fat slice of real vanilla bean ice cream.  And those mini chips?  You just gotta have that extra cronch! Thank goodness this recipe only makes 8 sandwiches, otherwise I would be eating them for breakfast lunch and dinner.  This way, my big family can help save me from my inner child diet-saboteur.   Print With Image Without Image Chonky Boy Chocolate Chip Cookie Ice Cream Sandwiches Yield: 8 Author: Jenn Erickson Loaded with chocolate chips and buttery, brown-sugary vanilla flavor, these mall-sized cookies form a perfect partnership with a

St. Patrick's Day Craft: Lucky Clover Pendant Necklace

Image
I was always the kid in school who got pinched on St. Patrick's Day because I wasn't wearing any green.  Maybe that's why I always like to send my girls off to school on St. Patty's with a little token of love and luck. I must admit, I felt pretty dar n lucky when the sample pack of dried flowers that I ordered for my Pressed Flower Easter Eggs turned out to contain three 4-leaf clovers!  I knew right away what I would make ... ...Lucky Clover Necklaces! They were SO easy to make and didn't cost a pot of gold either.   DIY Lucky Clover Pendant Necklace Time:  approx. 5 minutes Cost:  approx. $3.00  1" Circle Bezel Pendant Tray (Here's my SOURCE ) 1  1" Clear Glass Cabochon 1 Chain Luck or Lucky dictionary page (print for free HERE ) Cardstock Pressed 4-leaf clover (Here's my SOURCE ) Mod Podge Dimensional Magic Small paintbrush I purchased a set that included 5 of each (bezel, cab

Vintage Style: 1930s Velvet Shamrock Pin Tutorial

Image
This week my mind is focused on studying for the CSET in order to start student - teaching in the fall.  So, to keep the creativity and merriment going here while I revisit ancient Mesopotamia, navigate through mitochondrial DNA, and tango with the Pythagorean Theorem, I've dusted off a simple little St. Patty's Day project from the Rook No. 17 archives. These very chic and charming little shamrock pins look just like them came out of a fancy millinery shop from the 1930s. Grab some buttons, glue, wire and velvet tubing and let's go... Velvet Shamrock Pins 18" Velvet Tubing (a.k. a. piping or cord ) per pin   try JoAnns Stores Or Etsy HERE and HERE   Or Mendels (for light green) 18 " of 22 gage floral wire pretty buttons hot glue gun pin backs Optional:  Fabric rosettes made from scrap fabric or la ce Step 1:  Remove the cord from inside the length of tubing.   Step 2:  Insert wire into tubing, and seal

Book Review: Wonder by R.J. Palacio
A Must-Read for Tweens

Image
When I find a good book, I can't help but shout it from the rooftops. I'm a bibliophile -- Book Lover -- it's right there in my bio. And this book...this book is a treasure . For my graduate course in teaching literacy (for grades 4-8) this term, we're required to read eight books written for young adults .  I couldn't be happier that I picked Wonder by R.J. Palacio for my first read. " Wonder is essentially ... a wonder. It's well-written, engaging, and so much fun to read that the pages almost turn themselves. More than that, Wonder touches the heart in the most life-affirming, unexpected ways, delivering in August Pullman a character whom readers will remember forever. Do yourself a favor and read this book – your life will be better for it. " - Nicholas Sparks , #1 New York Times bestselling author T his book is an absolute must-read for every middle school aged child. It's a story about friendship, being

How to Make: Easy Chocolate Dipped Caramallow Patties

Image
  Who loves Caramels? Me, Me, Me, ME! If you do too, BEWARE this recipe. The caramel is so melt-in-your-mouth PERFECT! (and it's easy to make) Over the holidays, I made some caramallows and they were delicious -- oh yes!  But I have to admit that the time and labor involved in making the caramel made me question whether I'd be making them again next year.  Typically, making caramel involves a long and patient process with a bubbling pot of volatile candy and keeping a watchful eye on a candy thermometer.  This alternative method, in the microwave, takes just 6 minutes.   JUST SIX MINUTES (yes I'm shouting)!   Are you ready?  Let's go...   Chocolate Dipped Caramallow Patties (makes 30-40) One batch 6-minute Caramel (adapted from food.com ) 1/4 cup unsalted butter 1/2 cup granulated sugar  1/2 cup dark brown sugar 1/2 cup light corn syrup 1/2 cup sweetened condensed milk 30-40 mini marshmallows 10 oz. hi

The Cat's Meow: A Vintage Cat & Kitten Scrap Sheet for You

Image
  I'm positively smitten with these kittens! I couldn't resist adding this vintage West German scrap sheet to my collection when I spotted it at a tag sale this weekend.  C'mon, it's cats in hats! Download and enjoy. It's FREE! Happy crafting!

Free Vintage Graphics: 1913 St. Patrick's Day Postcard & Clipart

Image
This weekend my girls and I had some fun poking around a small vintage flea market. One of my treasures was this charming little Saint Patrick's Day postcard, dated 1913. The postcard is addressed to Rosy from Nelson.  From the content and inscription on the front, they appear to have been school chums.  So sweet! I cleaned up the original image and created a piece of clipart as well for you to use this St. Patty's Day.  I think the medallion would be perfect for cupcake picks!   If you have some creative fun with these images, you're welcome to show off your creation(s) on the Rook No. 17 Facebook page:  HERE .  

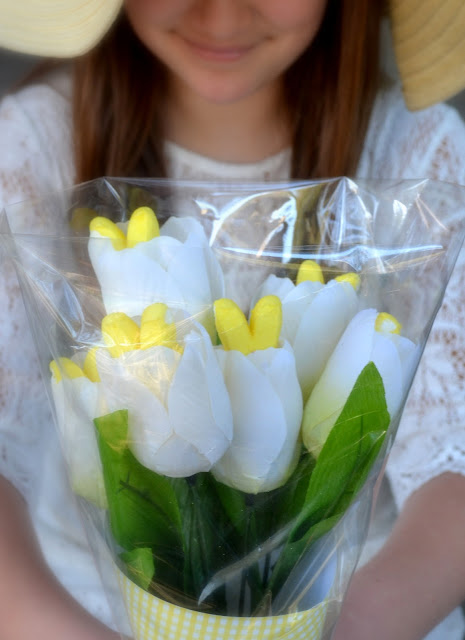
Everything's Coming Up {PEEPS} Bunnies Bouquet ~ A Dollar Store DIY

Image
I'm so excited to share this sweet little Easter craft! It's easy, inexpensive, and scrumptiously charming! Inside each silky tulip blossom is a soft and sweet marshmallow bunny. You can find almost everything you need at your local dollar store (except the Peeps themselves).   Each bouquet takes only a few minutes to make. Everything's Coming Up Bunnies Bouquet Time:  approx. 5 minutes Cost:  approx. $3/bouquet Materials Marshmallow Bunny PEEPS (7-8 per bouquet) 1 bunch silk tulips (I found pink, purple, white and yellow at my local Dollar Tree) 1 sheet scrapbook paper per/bouquet clear cellophane scissors transparent tape 4 round toothpicks, broken in half   Step 1:  Insert a toothpick half, p ointed end down, into the center of each flower.  T IP:  I found it best to try to insert the toothpick in the hole in the center that attaches the blossom to the stem.  Avoid displacing the stem by inserting